AD Banner

Featured

3/featured/recent

footer about

Videos

6/cate2/videos
Adv (300 x 250)

Find us on Facebook

5/cate3/lifestyle

Advertisement

6/breakingnews/random

Instagram posts

About us

3/cate1/entertainment

Recent Comments

Lorem Ipsum is simply dummy text of the printing and typesetting industry. Lorem Ipsum has been the industry's standard dummy text ever since the 1500s, when an unknown printer took a galley of type and scrambled it to make a type specimen book.
Copyright ©2019 by Mogtemplates

contact form

Name

Email *

Message *

Other News

[Related][recentmag]

EHI ONLINE LESSONS

EHI ONLINE LESSONS

Powered by Blogger.

Random Posts

World News

[World News][recentmag]
featured

Header Ads

Total Pageviews

Search This Blog

Search This Blog

Latest

Brexit

Brexit

Football

Football

Random posts

5/cate4/random

Random Post

Adv (880 x 120)

News By Picture

pictures

Hot News

5/cate3/hottrend
Adv (880 x 120)

Labels

Hot News

[Hot News][recentmag]

Labels Cloud

Get In Touch
Footer Logo

Trending Posts Display

Labels List

Home Layout Display

Posts Title Display

Theme Layout

Theme Translation

Tech

tech

Games

games

Popular Posts

127 Likes
3,240 Followers
12.7k Subscribers
136 Followers

Pages

Recent Comments

How accessories make you a better lover. 18 ways devices are completely overrated. Operating systems in 12 easy steps.

Recent Posts

Adv (300 x 250)

Popular Posts

Trending Posts

By Ehijoshua (Jboss) → Wednesday 21 May 2014

A WordPress Blog in 5 Minutes


Start Your Blog or Site in 5 Minutes

When you think of WordPress, you may think of the word “blog”. WordPress is one of the world’s largest blogging platforms. However, did you know that you can build not only a blog using WordPress, but it is also a great way to build a website! This article will show you how easy it can be to get your blog, or website, up and running.
Before you build your WordPress site, you have to make the decision of where you are going to host it. Having a self-hosted WordPress site gives you completely control over how you manage your site. A web host is where you are going to install the WordPress software; in other words, the server where your site/blog is stored. That said, choosing a web host is an important decision. There are many hosting companies out there, but Bluehost is the best choice, especially for a WordPress site. Even WordPress itself recommends Bluehost as the number one recommended hosting service, and they don’t officially recommend many hosting companies.
There are many reasons why Bluehost is so highly recommended, but here are a few:
  • Their service, reliability and usability.
  • Bluehost has worked hard to make their Control Panel easier to use.
  • Bluehost has partnered with MOJO Marketplace to make installing WordPress a breeze.
  • They also offer courteous and professional 24 hour in-house technical support for your hosting account 7 days of the week all year long. That means when you call in at 1 in the morning on a Thursday, you are calling to the same place that your hosting account is at and some one there will be able to help you.
  • For $4.95 a month you can host unlimited websites, email accounts and domains; all on one account.
  • Bluehost uses custom built servers, this provides the most stable and reliable hosting environment.
Also, to help make sure that there is little to no risk for you, Bluehost has a 30 day money back guarantee. So, if their hosting is not what you need or want, you can cancel at anytime.

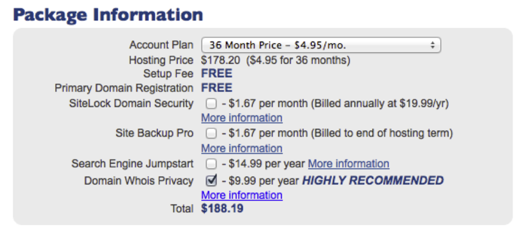
Note: Sign up through this tutorial to receive 36 months of hosting for $3.95, as well as a free domain name for a year!
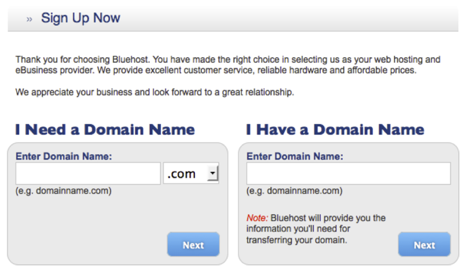
To get ready, you will want to gather a few things beforehand to make the process even smoother. Here are some things you will want to have on hand:
  • Think of a Domain Name
    A Domain name is the human recognizable companion to an IP address. The Domain name is tied to the IP address, so instead of typing in a string of numbers, we can simply type in something like “Google.com” and be taken to the correct web page.
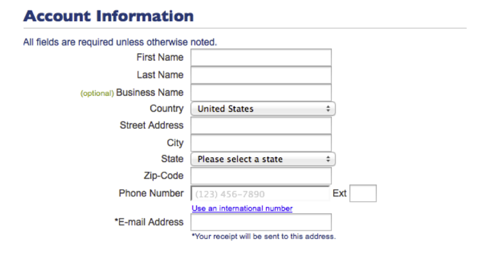
  • Your credit card for payment.

  • Set Up Your Hosting Account

    To get started, go to Bluehost's home page. Click Sign Up Now.
    Bluehost Home Page
    Next, you need to choose a domain name for your site. If you already own a domain name, you can enter it here, and you will just have to go through a few extra steps to make sure you get your DNS pointed to Bluehost. If you don't already own a domain name, you can purchase one now. It will be free with your hosting account purchase, as you get a free domain with a new hosting account. 

    Signup: Domain Name
    Once you have entered a domain name, you will fill in your personal information.
    Signup: Account Information
    Then you will choose the hosting package you want. Normal shared hosting is priced at 12, 24, and 36 month terms. The longer term you purchase, the lower the monthly rate is, which will save you money. For example, by choosing a 36 month hosting term, you can get the great introductory rate of $3.95 a month. Another great bonus to choosing Bluehost is that if you want more than a shared hosting account, Bluehost provides seamless upgrades to VPS or Dedicated hosting accounts from inside your cPanel!
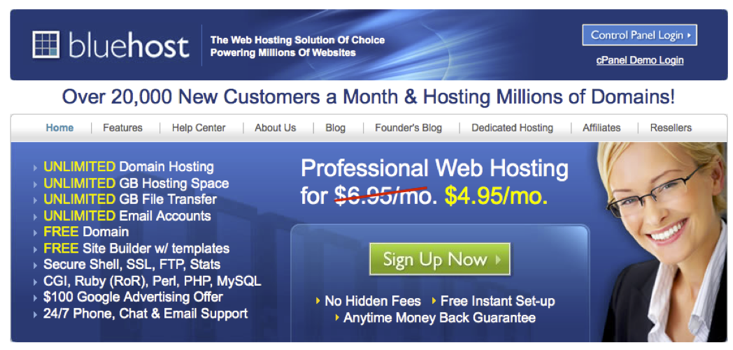
    There are a few other offers here, which you can include at your discretion. One that is highly recommended is Domain Privacy, which will keep all of your personal information private.
    Signup: Package Information
    After you have filled in your information and chosen your hosting package, you can click Next to complete your purchase. Now you will be asked to create a password for your account. You can use the Password Generator to create a strong password, or create one yourself. It is required to have both capital and lowercase letters, a number, and a special character (?!#, etc.) in order to have a strong enough password to protect your account.
    Now that you are all signed up and are able to log into your account, you will be able to get started installing WordPress.

    Installing WordPress

    This may seem like the most complicated step, but Bluehost has worked hard to make this one of the easiest things for you to do. They use the new MOJO Marketplace for installing WordPress (and other applications). 

    MOJO Marketplace
    In your cPanel, scroll to the section titled "MOJO Marketplace" and choose the icon One-Click Installs.
    WordPress: MOJO icon in cPanel
    You will now be on a page inside MOJO Marketplace called Scripts and Platforms. The blog section is at the very top, so all you have to do here is click on the WordPress icon.
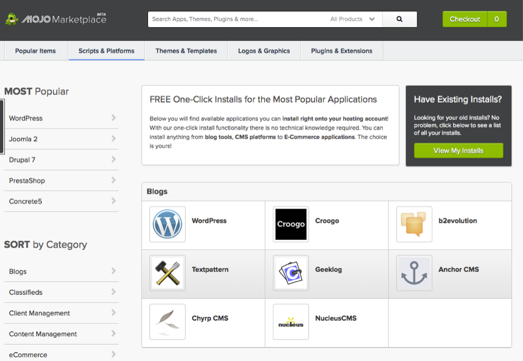
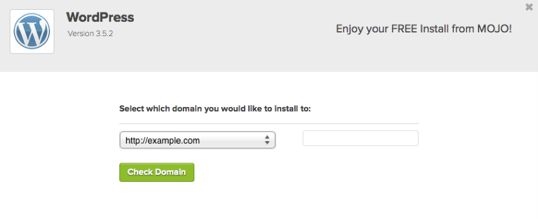
    This will open the installation window. Click on Start a brand new installation. This is going to start the WordPress installation process, which has a few easy steps:
    WordPress: Install WordPress
    Step 1: Choose where you want to install WordPress. This can be any domain on your account, or a subdomain or a folder for one of your domains. Next click Check Domain, which will make sure the domain is assigned and pointing to your account. You may get a warning that you are overwriting files, but as long as you don't have another website built yet, you can check the box and continue. This is mostly to make sure that you really want to install in that location. If you do have other sites built, you will want to make sure you’re not overwriting something important.
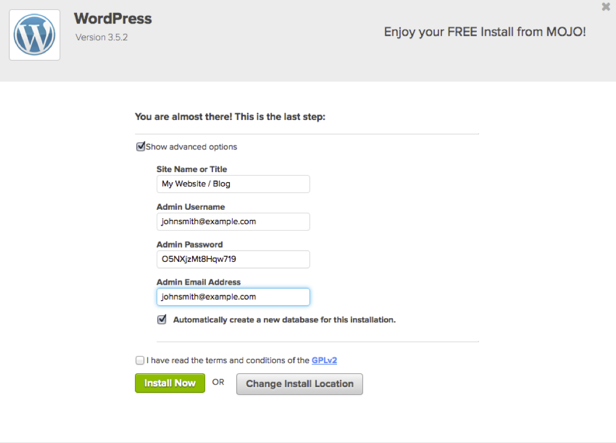
    Step 2: Show Advanced Options. This section allows you to set up your own username and password for your WordPress install. It is recommended to use a different username than 'Admin' and a very strong password. Make sure that the "Automatically Create a new database for this installation" box is checked, unless you have a database that you have already setup and want to use.
    WordPress: MOJO installation, advanced options.
    Step 3: Check the box saying that you have read the terms and conditions. Then click Install Now.
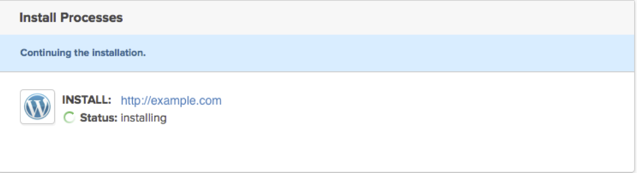
    You will now see the progress page, which will show you how far along the installation is. Once WordPress is fully installed, it will provide you with your Site URL, the admin login URL, your username, and password. You will get a copy of this information, except your password, in your email as well. Make sure you keep it in a safe place.
    WordPress: Installation Process
    Now you can log into your WordPress site, by going to the admin login URL. Enter your username and password, then click Log In. You will now be looking at the WordPress Dashboard. This is where you will control everything to do with your WordPress site, such as creating pages, writing posts, and changing the appearance.
    Remember: Sign up through this tutorial to receive 36 months of hosting for $3.95, as well as a free domain name for a year!

    Need More Help

    Check out this video showing how to install WordPress!
Jillur Rahman

I'm Jillur Rahman. A full time web designer. I enjoy to make modern template. I love create blogger template and write about web design, blogger. Now I'm working with Themeforest. You can buy our templates from Themeforest.

No Comment to " "